以下内容可能对某些用户阅读会困难(因微软的专业术语太多)尽量根据我的理解写的明白一点
准备软件Windows(R) 自动安装工具包 (Windows Automated Installation Kit 配置和部署的工具,Windows AIK) 上次使用的也是Windows AIK,功能很强大(自定义和更新 Windows 映像,部署,创建启动PE等等)。
关于Windows AIK微软技术论坛介绍应该比我清楚。我们要用到windows AIK里面的 Windows 系统映像管理器 (Windows SIM)来创建应答文件。 无人值守就是应答文件(同一个概念)。
去微软官方网站搜索并下载Windows AIK,按照提示安装完毕后从原版Windows 7 复制”install.wim”,”install_Windows 7 ULTIMATE.clg”放在同一个文件夹(随意,不要中文名就可以)
Windows 7 安装过程我不详细说明了,每个人都会,无非使用光盘,U盘安装结果都是一样的
Window 7 安装全部过程,其实是通过几个配置阶段来运行的 看截图 (这个图自己画的希望看的明白吧)

我们来验证一下,依次单击“开始”、“所有程序”、Microsoft Windows AIK,然后单击“Windows 系统映像管理器“ 下图

在 Windows SIM 的”文件“菜单上,单击”选择 Windows 映像“.在”选择 Windows 映像“对话框中,导航 中保存 Install.wim 的位置,然后单击”选定”.系统将提示您选择映像版本。根据实际情况要安装的 Windows 映像,然后单击”确定”我这里选择Windows 7 Ultimate(旗舰版)我们选择映像后,再在”文件”菜单上,单击”新建应答文件”.一个空答案文件会显示在”应答文件”窗格中。这时候你将看到SIM图片显示:

这时候你看到应答文件下面7个阶段(或者是模块),Windows 7 安装过程,都是这几个模块在控制安装工程的每一项设定的,每一个模块都有不同分工
【 windowsPE 】预安装环境
【offlineServicing】设定系统离线服务的
【generalize】 自定义系统映像,脱机映像服务设定系统部署过程的(普通)
【 specialize 】自定义系统映像,脱机映像服务设定系统部署过程的(特殊)
【auditSystem 】《审核模式 》 通过 Sysprep执行/audit 进入此模式,适用于企业用户
【 auditUser 】《审核模式 》
【 oobeSystem 】设置OOBE全新体验 (全新体验)

下面我们利用这些模块来构建应答文件,通过应答文件控制安装过程的相应设置
应用应答文件(初级阶段)
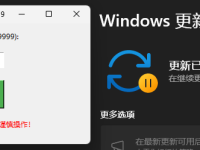
通过制作自动应答文件来了解一下,ES4.1封装工具一些设置(简单设置)

这个图是安装过程要求设置【要安装上的语言】,【时间和货币格式】,【键盘和输入方式】
在左下角的”Windows 映像”栏中展开Windows 7的映像,展开Components,找到Microsoft-Windows-International-Core-WinPE分支(设置定默认的语言,区域设置和其他国际设置Windows安装程序或Windows部署服务安装过程中使用)。选中模块”添加设置以传送 1Windows PE (1)” 看图片操作:

InputLocale 输入法区域设置 设置输入语言 [ 0804 2052 zh-CN 中文(简体) – 中国 0404 1028 zh-TW 中文(繁体) – 台湾 0C04 3076 zh-HK 中文 – 香港特别行政区 04091033 en-US 英语 – 美国]
LayeredDriver SystemLocale 系统区域设置
UILanguage 界面语言 设置用户界面的语言
UILanguageFallback 界面语言回退,当”UILanguase”选用小地区时,若程序没有该种语言,则会跳至”UILanguageFallback”选项
UserLocale 用户区域设置 日期、时间、数字等格式
WillShowUI 安装前是否显示对话框询问用户有关安装界面的语言设置
参数:”OnError”指有错误时显示对话框;”Never”指任何情况下永不显示;
”Always”是指每次都显示。由于我们希望达成自动安装的目的,
因此选用”OnError”可减少用户需要手工输入的机会。
我们选择zh-CN (简体中文) ,这时候我们查看无人值守文件 内容是这样的
- <?xml version=”1.0″ encoding=”utf-8″?>
- <unattend xmlns=”urn:schemas-microsoft-com:unattend”>
- <settings pass=”windowsPE”>
- <component name=”Microsoft-Windows-International-Core-WinPE” processorArchitecture=”amd64″ publicKeyToken=”31bf3856ad364e35″ language=”neutral” versionScope=”nonSxS” xmlns:wcm=”<a href=”http://schemas.microsoft.com/WMIConfig/2002/State”>[url]http://schemas.microsoft.com/WMIConfig/2002/State</a>[/url]” xmlns:xsi=”<a href=”http://www.w3.org/2001/XMLSchema-instance”>[url]http://www.w3.org/2001/XMLSchema-instance</a>[/url]”>
- <SetupUILanguage>
- <UILanguage>zh-CN</UILanguage>
- </SetupUILanguage>
- <InputLocale>0804:00000804</InputLocale>
- <SystemLocale>zh-CN</SystemLocale>
- <UILanguage>zh-CN</UILanguage>
- <UserLocale>zh-CN</UserLocale>
- </component>
- </settings>
- <cpi:offlineImage cpi:source=”wim:g:/windows7/install.wim#Windows 7 ULTIMATE” xmlns:cpi=”urn:schemas-microsoft-com:cpi” />
- </unattend>
复制代码
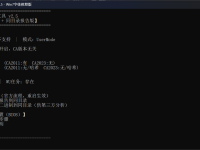
ES4.1封装工具相应的设置看截图 :

在ES4.1在第二阶段也有相应设置,我不截图

安装过程出现这两个图片不陌生吧
Microsoft 软件许可协议和windows安装过程中的要求我们输入序列号(KEY),那么怎么通过SIM来设置通过这个过程呢,来啦
方法:在左下角的”Windows 映像”栏中展开Windows 7的映像,展开Components,找到Microsoft-Windows-Setup分支(设置来选择您安装的Windows映像,配置您安装Windows的硬盘,并配置Windows PE的操作系统)——–UserData依次展开。选中模块”添加设置以传送 1Windows PE (1)”

AcceptEula
指定在 Windows 安装期间是否接受 Microsoft 软件许可条款
这时候我们查看无人值守文件内容是这样的:
- <?xml version=”1.0″ encoding=”utf-8″?>
- <unattend xmlns=”urn:schemas-microsoft-com:unattend”>
- <settings pass=”windowsPE”>
- <component name=”Microsoft-Windows-Setup” processorArchitecture=”amd64″ publicKeyToken=”31bf3856ad364e35″ language=”neutral” versionScope=”nonSxS” xmlns:wcm=”<a href=”http://schemas.microsoft.com/WMIConfig/2002/State”>http://schemas.microsoft.com/WMIConfig/2002/State</a>” xmlns:xsi=”<a href=”http://www.w3.org/2001/XMLSchema-instance”>http://www.w3.org/2001/XMLSchema-instance</a>”>
- <UserData>
- <ProductKey>
- <WillShowUI>OnError</WillShowUI>
- <Key>TWMF7-M387V-XKW4Y-PVQQD-RK7C8</Key>
- </ProductKey>
- <AcceptEula>true</AcceptEula>
- </UserData>
- </component>
- </settings>
- <cpi:offlineImage cpi:source=”wim:g:/windows7/install.wim#Windows 7 ULTIMATE” xmlns:cpi=”urn:schemas-microsoft-com:cpi” />
- </unattend>
复制代码
在ES4.1封装工具有相应的设置 看截图:

在第二阶段也有相应设置,我不截图

Windows 7安装结束安装看到这两个图片,出现要求用户设置【用户名】,【计算机名】,【设置用户密码 】
那么请继续看过来
方法:那么请看过来 ,在左下角的”Windows 映像”栏中展开Windows 7的映像,展开Components,找到Microsoft-Windows-Shell-Setup分支(控制如何在Windows操作系统安装在目标计算机上的内容和设置)—————AutoLogon依次展开-,”添加设置以传送 7 oobeSystem (7)


Domain 域
Enabled 已启用
LogonCount 登录计数
Username 用户名
Password 密码(空、)
这时候我们来看看,自动生成的
- <?xml version=”1.0″ encoding=”utf-8″?>
- <unattend xmlns=”urn:schemas-microsoft-com:unattend”>
- <settings pass=”oobeSystem”>
- <component name=”Microsoft-Windows-Shell-Setup” processorArchitecture=”amd64″ publicKeyToken=”31bf3856ad364e35″ language=”neutral” versionScope=”nonSxS” xmlns:wcm=”<a href=”http://schemas.microsoft.com/WMIConfig/2002/State”>[url]http://schemas.microsoft.com/WMIConfig/2002/State</a>[/url]” xmlns:xsi=”<a href=”http://www.w3.org/2001/XMLSchema-instance”>[url]http://www.w3.org/2001/XMLSchema-instance</a>[/url]”>
- <AutoLogon>
- <Password>
- <Value>UABhAHMAcwB3AG8AcgBkAA==</Value>
- <PlainText>false</PlainText>
- </Password>
- <Enabled>true</Enabled>
- <Username>Administrator</Username>
- </AutoLogon>
- </component>
- </settings>
- <cpi:offlineImage cpi:source=”wim:g:/windows7/install.wim#Windows 7 ULTIMATE” xmlns:cpi=”urn:schemas-microsoft-com:cpi” />
- </unattend>
复制代码
ES4截图如下:

那么这些设置,在无人值守文件里面怎么制作


看下面操作
【区域时间设置】
在左下角的”Windows 映像”栏中展开Windows 7的映像,展开Components,找到Microsoft-Windows-Shell-Setup分支(控制如何在Windows操作系统安装在目标计算机上的内容和设置)—————AutoLogon依次展开-,”添加设置以传送 7oobeSystem(7)

China Standard Time 中国标准时间
生成无人值守文件:
- [align=left]<?xml version=”1.0″ encoding=”utf-8″?>
- <unattend xmlns=”urn:schemas-microsoft-com:unattend”>
- <settings pass=”oobeSystem”>
- <component name=”Microsoft-Windows-Shell-Setup” processorArchitecture=”amd64″ publicKeyToken=”31bf3856ad364e35″ language=”neutral” versionScope=”nonSxS” xmlns:wcm=”[url=http://schemas.microsoft.com/WMIConfig/2002/State]http://schemas.microsoft.com/WMIConfig/2002/State[/url]” xmlns:xsi=”[url=http://www.w3.org/2001/XMLSchema-instance]http://www.w3.org/2001/XMLSchema-instance[/url]”>
- <TimeZone>China Standard Time</TimeZone>
- </component>
- </settings>
- <cpi:offlineImage cpi:source=”wim:g:/windows7/install.wim#Windows 7 ULTIMATE” xmlns:cpi=”urn:schemas-microsoft-com:cpi” />
- </unattend>
- [/align]
复制代码

![Win11 64位 25H2 专业完整版 [IT天空驱动包] 2026年1月](https://lvsexitong.com/wp-content/uploads/2025/10/Windows-10-x64-2026-01-29-01-13-23-200x150.png)
![Win10 64位 22H2 专业完整版[IT天空驱动包]2026年1月](https://lvsexitong.com/wp-content/uploads/2025/12/Windows-10-x64-2026-01-25-00-51-42-200x150.png)
![Win10 LTSC 2021 64位 完整版 [IT天空驱动包]2026年1月](https://lvsexitong.com/wp-content/uploads/2025/09/Windows-10-x64-2026-01-21-21-00-40-200x150.png)
![Win11 24H2 LTSC 企业完整版 64位 [IT天空驱动包]2026年1月](https://lvsexitong.com/wp-content/uploads/2025/04/Windows-10-x64-2026-01-19-02-39-45-200x150.png)